
How to Buy Landscape Lighting – Design and Install Your System
Some fixtures illuminate walkways and driveways while others highlight plants and fountains. Landscape lighting covers various outdoor lighting fixtures, that when used together, can bring your property to life at night.
In this guide on how to buy landscape lighting, we reveal everything you need to know to design and connect your own lighting system outside your home:
- Landscaping Lighting Types
- Three Types of Lighting Systems
- Customizing Your Lighting System
- How to Connect Your Landscape Lighting System
- Benefits of LED Landscape Lighting
Landscape Lighting Types
Landscape lighting can increase curb appeal with an inviting, layered look using a combination of different lights:
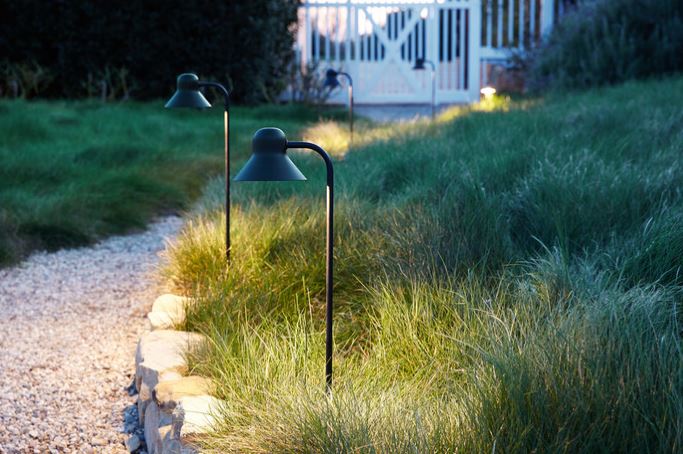
Path Lights: Use them to line walkways and driveways.
Landscape Spot and Floodlights: Highlight plants, trees, fountains or other areas of interest in the yard. Spotlights have a focused beam of light; floodlights illuminate a wide area.
Well Lights: These are placed in the ground and shine upwards to accent trees and plantings.
Step & Deck Lights: Increase safety with step and deck lights and along stairs and railings.
Post Cap Lights: Placed on the end railings, post cap lights add additional lighting to decks and porches.

Three Types of Lighting Systems
Low Voltage Landscape Lighting: these systems use a transformer that converts or steps-down your home’s 110-120 volt current to a lower voltage, usually 12 volts.
We recommend using low voltage systems. The low voltage prevents the risk of shock and makes for easier installation since the electrical cable can run along the ground without conduit.
Line Voltage systems hard-wire into your home’s standard 110-120 volt feed, just like the rest of the lights around your house.
Solar Powered Landscape Lights are self-contained lights, rather than an actual system. For best results, they should be used in bright daylight locations and in sunny climates.
Customizing Your Lighting System
You can create a system to meet your unique needs with this simple combination of parts:
Lights – Feel free to use a mix of flood, spot and path lights to fit your needs.
Cable – For low-voltage landscape systems, be sure to use low voltage wire that is rated for outdoor use. Also, it’s best to keep extra cable on hand, in case you decide to alter your layout.
Connectors – Corrosion-proof and waterproof gel-filled connectors make connecting lights and cables extra simple! Connectors are included with all the landscape lights we sell.
Landscape Transformers – Low voltage systems require a transformer to lower your home’s line voltage. Both hard-wire and plug-in versions are available.
Some transformers have built-in timers or photocells for automatic on/off operation.
For an easy, out-of-the-box solution, use our complete landscape light kits which include everything you need.
How to Choose a Landscape Transformer
Here’s a simple formula for choosing the correct transformer for your low-voltage system:
+ Add together the wattage of all the individual lights in your system (example: 5 lights using 20 watts each: 5 x 20 = 100)
x Multiply that total by 1.5 (1.5 x 100 = 150)
= The resulting number is the transformer size, in watts, that you’ll need. (150 watts)
Note: Transformers have a minimum load requirement of 15%. This means that a transformer rated at 100 watts, for example, will need at least 15 watts of lighting attached to it to work properly.
How to Install Landscape Lighting Systems
Landscape lighting is quite easy to work with and can be a rewarding DIY weekend project. Remember, if you’re ever in doubt about a project, we recommend you consult with a licensed electrician.
1. Lay Out the Components
Place all your lights around your yard. Don’t connect them until you’re sure of the placement.
Then, loosely run the cable along the ground to each of the lights. Leave extra slack so you can reposition lights easily.
2. Connect It All
Start by connecting the lights. Then connect everything to the transformer.
3. Plug It In
You can fine-tune your lighting placement by checking everything right at dusk. You’ll get a sense of how everything will look at night with just enough residual daylight left to work.
4. Cover the Cables
A light layer of dirt or other ground cover is enough to hide your cables. Placing them along the edges of hardscaping provides extra protection and makes it easier to locate the cable later, if needed.
The Benefits of LED Landscape Lighting
LED lighting is up to 10x more energy efficient and 25x longer lasting than regular incandescent lighting. Why is this ideal for landscape lighting?
1. You can turn the lights on in the evening for a small fraction of the cost.
2. You can say goodbye to the hassle of outdoor bulb changes. LED lighting has a long life and will last for years.
3. Because LEDs use so little watts of energy, you can use more of them with any given transformer.
Brightness and Color Temperature
Brightness – A little goes a long way outdoors. A light that outputs as little as a few hundred lumens will provide adequate illumination for most landscape applications. An added benefit is that these lower levels of light in your yard mean less light pollution in the skies overhead.
Color Temperature – As a general rule, warmer colors (in the 2700K to 3000K range) look best at night, adding an inviting glow.
More Landscape Lighting Ideas and Advice
Designing a Landscape Lighting System
Landscape Lighting – Tips for Getting Started
5 Things to Know Before You Buy Landscape Lighting